Spring-boot打包

Spring-boot相比SpringMVC,基本干掉了繁琐的配置文件,Spring-boot自动完成默认配置。若有自定义配置,在application.properties配置文件覆盖即可。
Spring-boot内置tomcat,部署时打成jar包,放到线上启动即可,但独立服务,包文件较大。若多个Spring-boot想使用同一个tomcat或者运维要求Spring-boot项目同其他web项目放到同一容器里,则要考虑打成war包。
使用Maven进行项目管理及构建,打包类型配置在依赖文件pom.xml指明。

打成jar包

1.声明打包类型为jar

1
<packaging>jar</packaging>

2.使用命令 mvn clean package打包部署后,执行

1
nohup java -jar PokerAgentServer.jar >/dev/null 2>&1 &

nohup 表示后台运行,结尾&保证nohup正常运行。>/dev/null 2>&1表示不生成nohup.out文件。
声明运行依赖其他类的路径,例如类库及配置文件,则使用-classpath或简写-cp命令,使用此参数则不能使用-jar,-jar会忽略-cp指定的路径
1
nohup java -cp ../dist/*:../lib/*:../resource org.springframework.boot.loader.JarLauncher >/dev/null 2>&1 &

3.若进行远程调试,使用如下命令:

1
nohup java -Xdebug -Xrunjdwp:transport=dt_socket,server=y,suspend=y,address=8091 -jar PokerAgentServer.jar &


1
nohup java -Xdebug -Xrunjdwp:transport=dt_socket,server=y,suspend=y,address=8091 -cp ../dist/*:../lib/*:../resource org.springframework.boot.loader.JarLauncher >/dev/null 2>&1 &

Host为远程主机地址。开启8091端口。
debug_remote

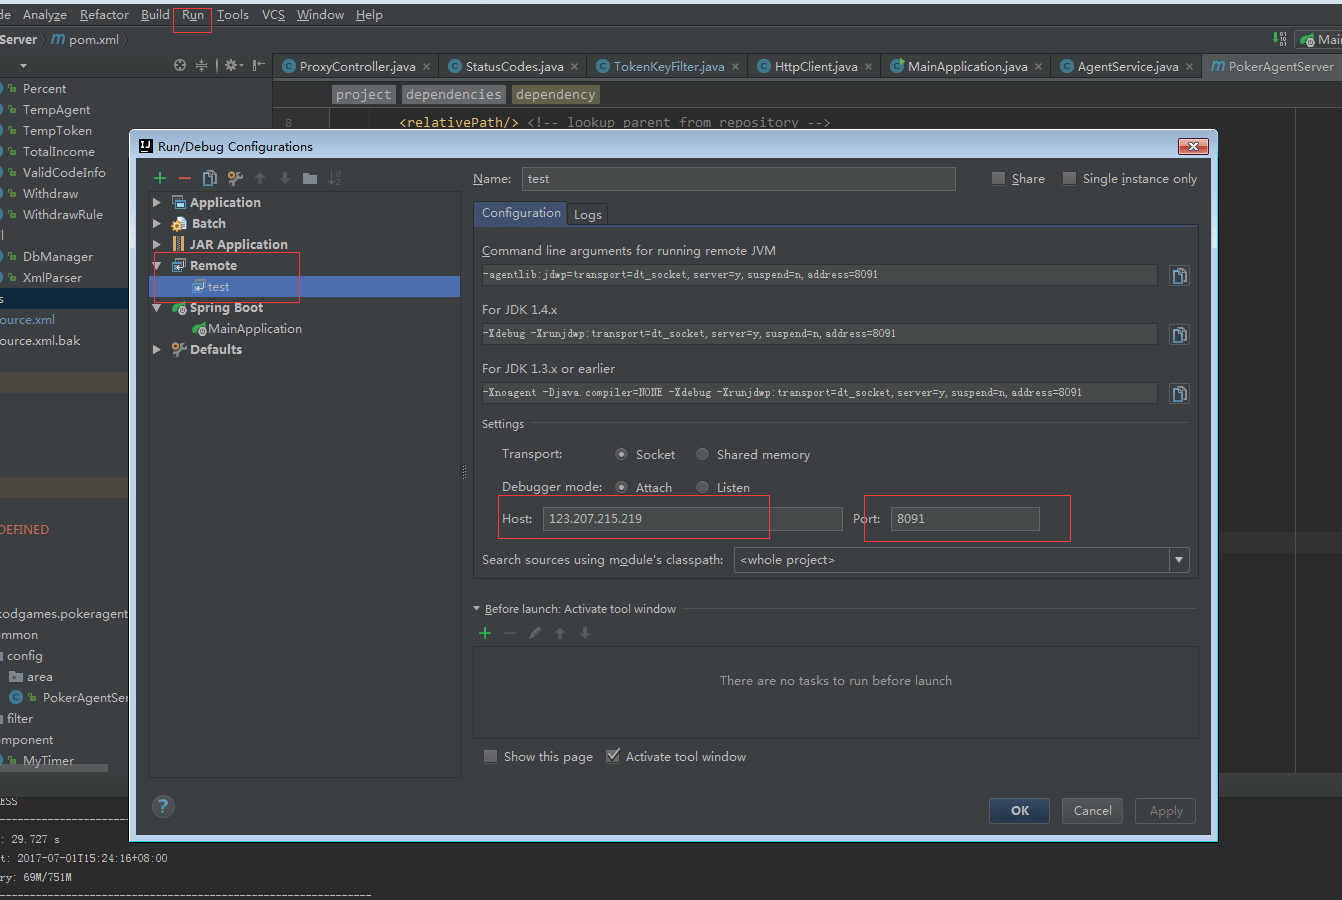
4.Spring-boot打包会将配置一并达到jar包中,此时需要将resource中的文件删除,再执行mvn clean package打包。启动时,-cp声明依赖的配置文件。

1
nohup java -cp ../dist/*:../lib/*:../resource org.springframework.boot.loader.JarLauncher >/dev/null 2>&1 &`

-jar与-cp有冲突。如果使用-jar选项,java.exe会忽略-cp。这里入口类是org.springframework.boot.loader.JarLauncher,将jar包解压,打开META-INF/MANIFEST.MF文件,如下:
jarlaunch

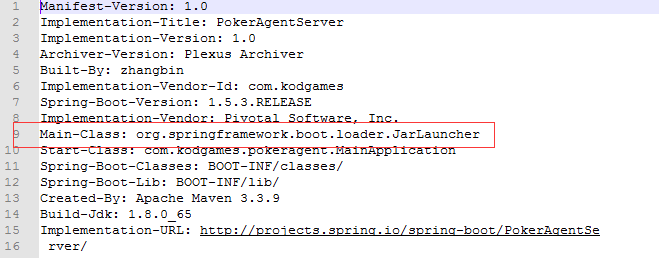
5.输入命令启动,实际加入性能调优参数后,通过sh文件或者python脚本启动。

打成war包

1.修改pom文件

  • 打包形式改为war

    1
    <packaging>war</packaging>
  • 移除嵌入式tomcat

    1
    2
    3
    4
    5
    6
    7
    8
    9
    10
    <dependency>
    <groupId>org.springframework.boot</groupId>
    <artifactId>spring-boot-starter-web</artifactId>
    <exclusions>
    <exclusion>
    <groupId>org.springframework.boot</groupId>
    <artifactId>spring-boot-starter-tomcat</artifactId>
    </exclusion>
    </exclusions>
    </dependency>
  • 添加servlet-api依赖

    1
    2
    3
    4
    5
    <dependency>
    <groupId>org.apache.tomcat</groupId>
    <artifactId>tomcat-servlet-api</artifactId>
    <version>9.0.1</version>
    </dependency>

    1
    2
    3
    4
    5
    6
    <dependency>
    <groupId>javax.servlet</groupId>
    <artifactId>javax.servlet-api</artifactId>
    <version>4.0.0</version>
    <scope>provided</scope>
    </dependency>

2.修改启动类,继承SpringBootServletInitializer

1
2
3
4
5
6
7
8
9
10
11
12
13
14
15
16
17
18
19
20
21
22
23
24
25
26
27
28
@SpringBootApplication
public class MainApplication extends SpringBootServletInitializer {
private static final Logger logger = LoggerFactory.getLogger(MainApplication.class);
@Autowired
private Environment env;
public static void main(String[] args) {
SpringApplication.run(MainApplication.class, args);
}
// 配置filter实现前端的跨域访问
@Bean
public FilterRegistrationBean filterRegistrationBean() {
FilterRegistrationBean registration = new FilterRegistrationBean();
registration.setFilter(new CrossOriginFilter());
registration.addUrlPatterns("/*");
return registration;
}
@Bean
public FilterRegistrationBean filterTokenKeyBean() {
logger.info("path filter is:->{}", env.getProperty("filter.token"));
FilterRegistrationBean registration = new FilterRegistrationBean();
registration.setFilter(new TokenKeyFilter(Boolean.parseBoolean(env.getProperty("filter.token"))));
registration.addUrlPatterns("/*");
return registration;
}
}

3.使用命令 mvn clean package 打包后,war包放到tomcat的webapps目录下,启动tomcat,即可自动解压部署。浏览器输入路径即可访问:

1
http://localhost:[端口号]/[打包项目名]/